


Clean up your Gmail and Google One accounts to free up space and avoid paying for extra storage.
The moment you’ve been dreading for months (or weeks) has finally arrived. Your Google storage space is almost full, compromising the proper reception of your emails on Gmail. In any case, this is what Google has just announced to you in an email in which a solution is nevertheless offered to you: subscribe to a paid Google One offer to extend your storage capacity.
With only 15 GB of free space to share between Gmail, Google Drive and Google Photos, cleaning up your inbox, and more generally all Google services using the allocated storage, quickly becomes essential.

Before you decide to subscribe to the first Google One offer (billed at 1.99 euros per month for 100 GB of storage) you can undoubtedly get a reprieve. How? Simply by clearing out your Google One storage and deleting unnecessary messages in Gmail. While it is possible to do this manually, the operation can be tedious. To save you from this, Google has integrated a Storage Space Manager into Google One that does some of the work.
1. Go to Storage Manager
Open your regular web browser, and head over to Google One Storage Manager. On this page, you can see how much storage space is being used for each Google app you use.

This is also the page where Google suggests items to delete to free up space on shared storage between Gmail, Google Photos, Google Drive, etc.
2. Review the suggested items
Typically, Storage Manager offers to delete a number of items: junk emails, emails with large attachments, large files, large photos and videos, and so on. Depending on what you store on Google One, how many emails (and their attachments) you have, the suggestions for what to delete may vary.

Now click on the Review button on the first suggested items (which is Spam emails here in the image above). Then select the items you want to get rid of and click on Delete. You can also click on Delete All directly to get rid of all the items suggested by Google.
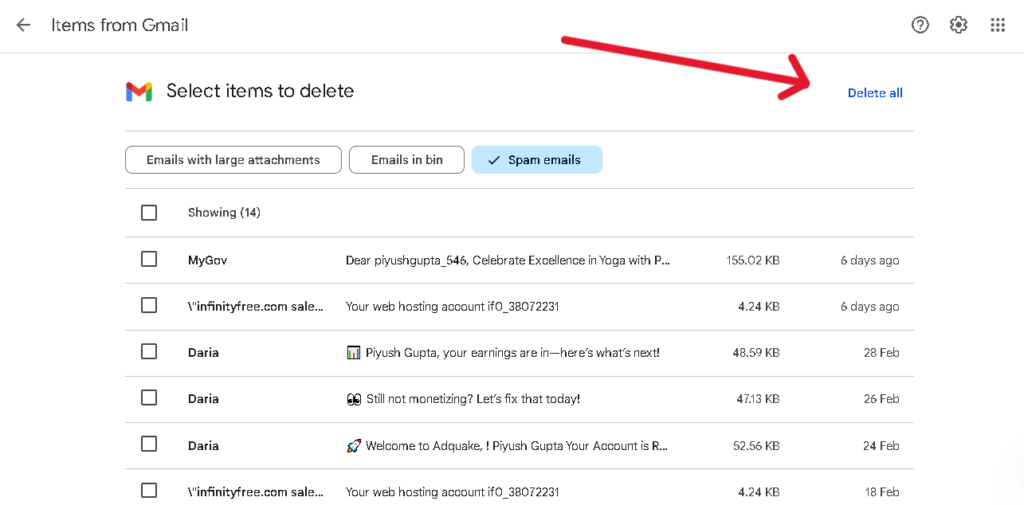
In the pop-up that appears, check the I understand that deleted items cannot be restored option, and click Delete Permanently to get rid of them.

Then repeat the process for each item that Google suggests. You’ll delete not only data stored in Gmail, but also items hosted on your Google Drive, or photos and videos synced to your Google Photos account.
Basically, this cleaning wizard should help you delete the majority of unnecessary data without having to manually search for it in different services (large sent or received emails, trash, junk mail, large photos and videos, etc.)
3. Delete messages by category in Gmail
By using Google’s Space Manager, you may have been able to get rid of several gigabytes of data. However, you can go even further by manually skimming the unnecessary emails from your Gmail inbox.
Your inbox is probably full of ephemeral and useless missives, like newsletters, promotional messages, or even social media notifications. Typically, these messages end up piling up by the hundreds, if not thousands, and despite their small size, they monopolize a significant amount of space on the free storage allocated by Google.
While it is possible to delete each of these messages one by one, this operation may take you hours. To go faster, you can ask Gmail to organize your messages by classifying them into categories. Once in place, the option makes it much easier to locate these messages, each category having its own tab. You will then be able to delete all the messages corresponding to each defined category at once and thus clean up your Gmail inbox more quickly.
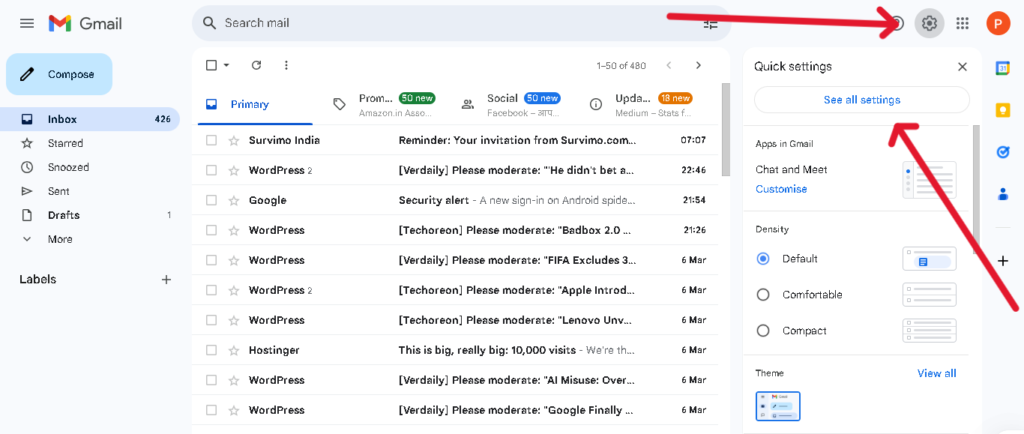
To rearrange how your emails are displayed, from your main inbox window, click the gear icon, then click See all settings.
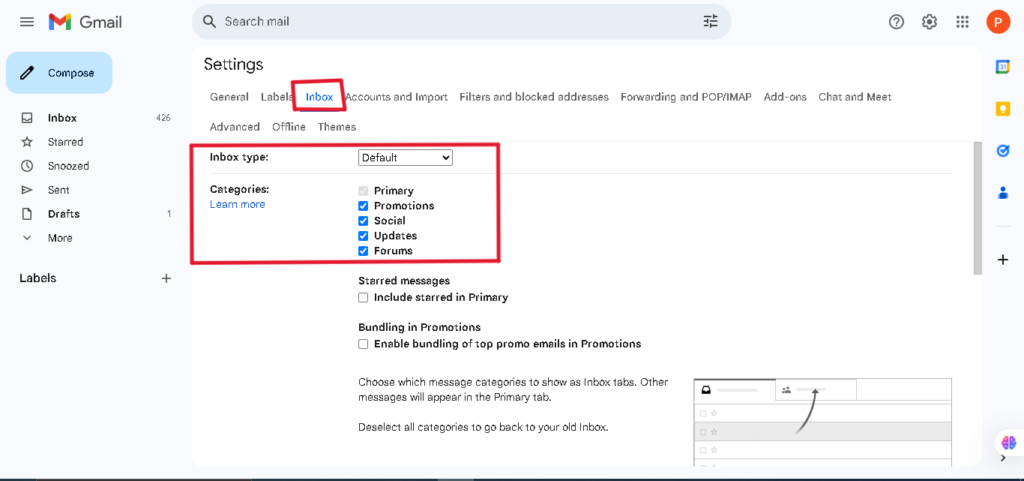
In the Gmail Settings page, go to the Inbox tab, select Default from the Inbox type drop-down menu, and then check the Social, Promotions, Notifications, Forums options displayed below.
Back in your inbox, your messages have been categorized into tabs. Click on one of them, for example, Promotions, and then proceed to delete the messages you don’t want to keep.
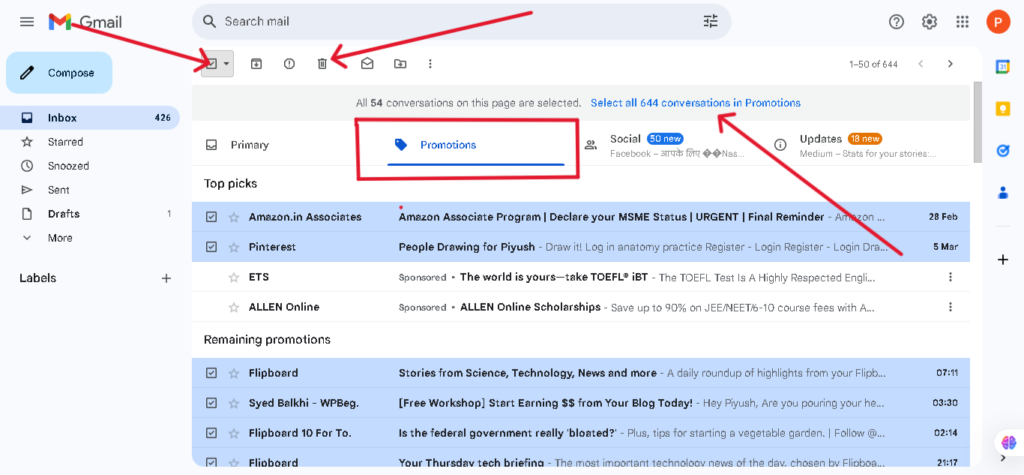
If you want to delete all messages in this category at once, check the Select all box in the top left. Then click Select XXXX conversations in [selected category] and then click the trash can icon displayed in the toolbar.
4. Create filters to remove unnecessary emails
To complement all the steps taken above, you can use Gmail’s search filters tool to quickly find and delete all unnecessary emails.
To do this, click on the search settings (the ‘three horizontal sliders’) icon displayed in the search field at the top of the window.

In the filter tool that appears, enter the term “unsubscribe“ in the Contains words line and then click Search.

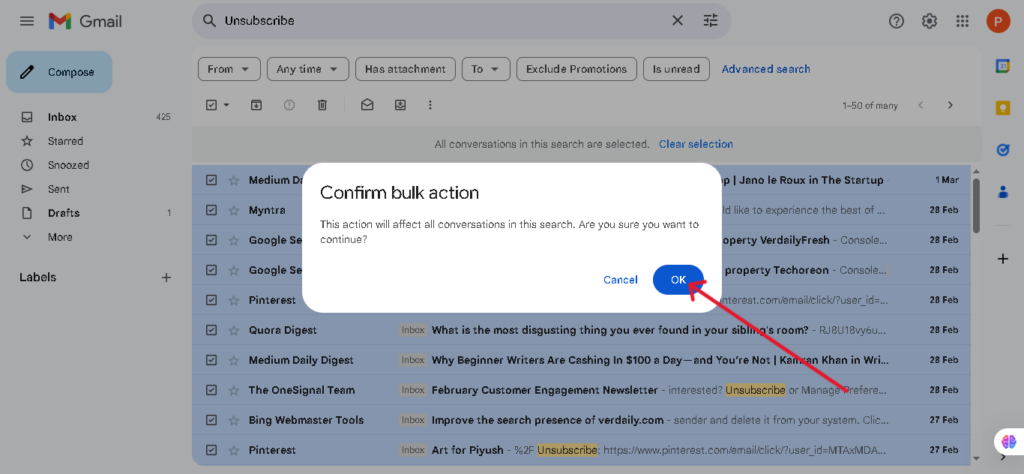
Gmail will now display all emails stored in your inbox that contain the term unsubscribe. Now click the Select all conversations that match this search menu and then click the trash can icon to delete the messages.

Then click OK in the Confirm Bulk Action window that appears. Depending on the number of emails to delete, the operation may take more or less time.
Remember, once you have sent messages to the trash, to empty it. You will find it in the left column (sometimes hidden in the More drop-down menu). Finally, click on the Empty Trash menu to permanently delete the messages.

Then repeat the same operation with other terms commonly found in promotional messages or newsletters: in addition to “unsubscribe“, you may also try using keywords such as
- “opt-out”
- “remove me”
- “cancel subscription”
- “stop emails”
5. Automate deletion of unnecessary emails with rules
Searching for emails using specific keywords can help you clear your Gmail inbox of thousands of emails. But you probably don’t want to have to do this multiple times a year. While it’s possible to unsubscribe from commercial messages and newsletters, it can be a time-consuming process if you have to go through them one by one.
Although it is still advisable to do so, you can (while you get to the end) create rules that will automatically delete these messages for you as soon as they are received. You can do this using the same keywords as those mentioned in the previous step: unsubscribe, unsubscribe, unsubscribe, unsubscribe, unsubscribe, etc.
Note that you’ll need to create one rule per keyword. To create a rule with a filter, click the Gmail settings icon, then click See all settings.

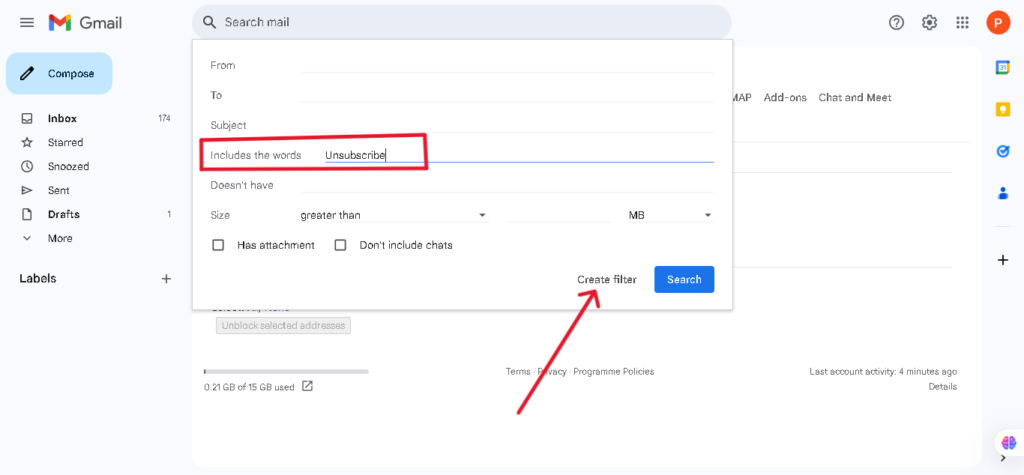
Then go to the Filters and blocked addresses tab and click Create a filter.

The Gmail filter tool will then appear. Enter your keyword in the Contains words field, then click the Create filter button.
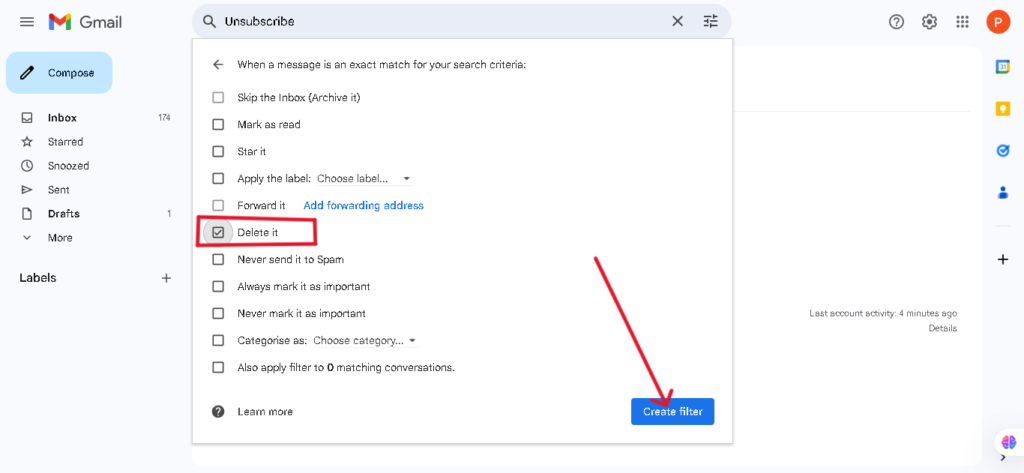
Now you need to select the action of the filter you just created. Then choose Delete, then click Create Filter to save your filter rule.
All new incoming emails that include the keywords mentioned in your filtering rules will be automatically sent to the trash folder.

And the good news is that these messages will automatically disappear from the Gmail trash after thirty days if you don’t remember to empty it manually.